
Requirements
AppSignal has an installation wizard that guides you through each step, so sign in to your AppSignal account before you start. If you don’t have an account yet, create a user account and an organization first. Check the supported operating systems documentation to make sure your system is compatible with AppSignal.Adding your application
To register a new application and open the installation wizard, select Add app on the applications overview page. If you’re already signed in, this link opens the wizard directly.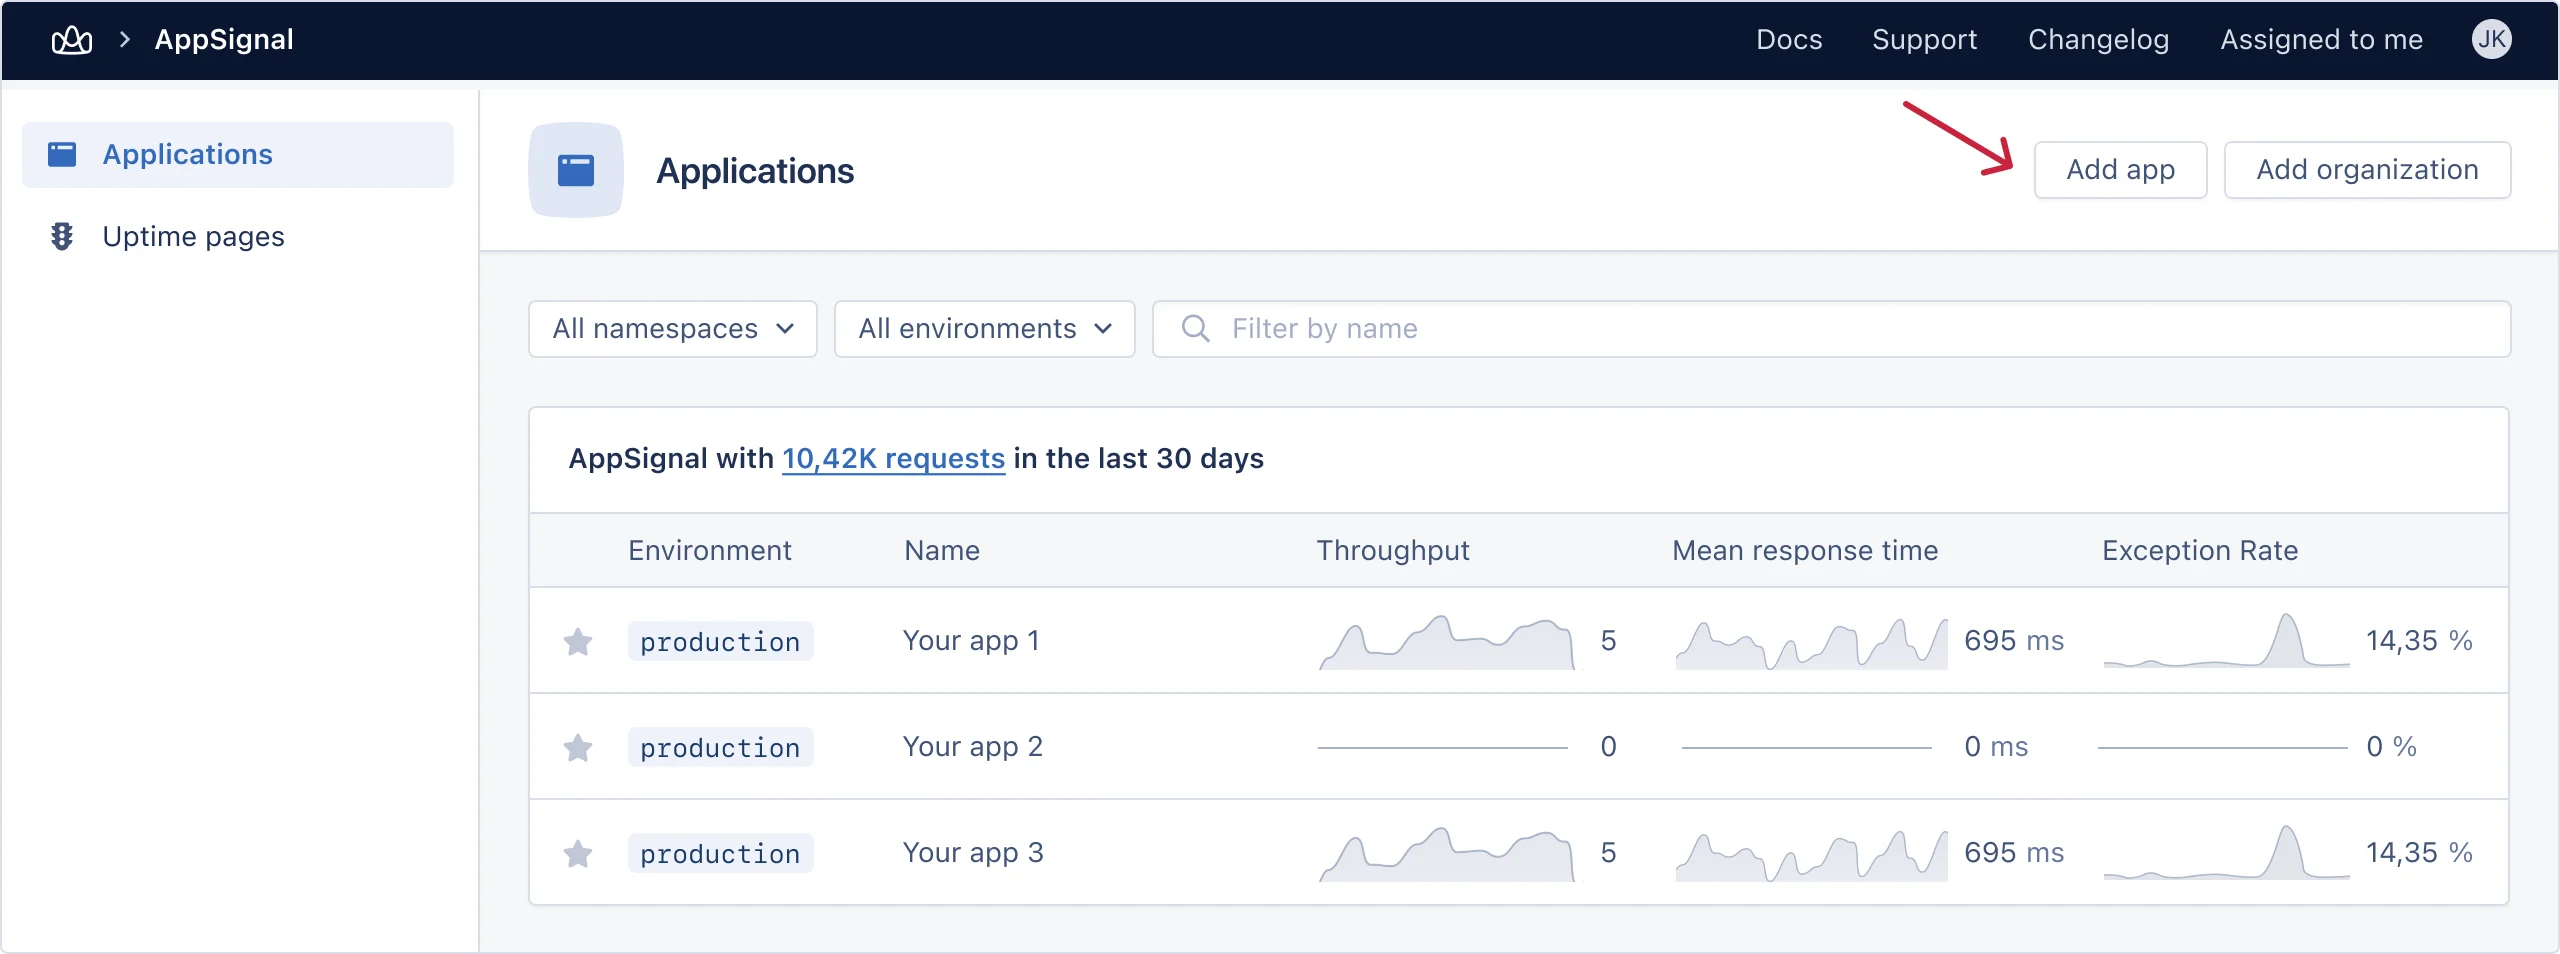
Quick install
Ruby, Elixir, Node.js, Python, and PHP follow the same five steps: get your Push API key, add the package, configure it, send test data, and deploy. Select your language in any code block below and the rest of this section follows your choice. For front-end JavaScript, Go, and Java, skip to installing other languages.PHP needs the OpenTelemetry PHP extension before you start. Read the PHP
requirements page first.
Step 1: Get your Push API key
Every step below needs your organization-wide Push API key. Open your organization’s API keys and copy the first key shown there. The installation wizard also shows it.Step 2: Add the package
Add AppSignal to your project’s dependencies, then install them:--allow-build: it suppresses lifecycle scripts by default, so without the flag the extension is never built and AppSignal reports nothing.
Step 3: Configure
Step 2 installed the package. This step creates its configuration file. Ruby, Elixir, Python and PHP ship a command that writes that file for you: run it from your application’s root directory with the Push API key from the wizard, and it asks for anything else it needs. Node.js ships no such command, so you write its file by hand, check the Node.js installation page for the full walkthrough.Distributed tracing needs your app to send its data through an AppSignal hosted collector. Create a collector on the “Hosted Collector” page in your organization’s settings. You can also set up AppSignal with AI, which creates one automatically.PHP always sends data through a collector, so use its “Collector URL” as the collector endpoint below. Python and Ruby need collector mode, which also enables logging for Python. Follow the Python or Ruby collector configuration guide.
- Ruby: Rails is wired up automatically. Sidekiq, Puma, Sinatra, and others are covered in the Ruby integrations documentation.
- Elixir: continue with the Phoenix or Plug guide if you use either.
- Python: AppSignal does not instrument libraries automatically. Add the packages for the libraries you use from the Python instrumentations documentation.
- PHP: the installer adds framework auto-instrumentation for you. See the PHP integrations documentation for what it covers.
- Node.js: load
appsignal.cjsbefore every other library by adding--require ./appsignal.cjsto the command that starts the app, for examplenode --require ./appsignal.cjs index.js. Nothing is instrumented without it. For compiled TypeScript, add--enable-source-mapsso backtraces point at your.tssource:node --enable-source-maps --require './appsignal.cjs' dist/src/main.js. See the Node.js integrations documentation.
Step 4: Send your first data
AppSignal registers a new application only once it receives data. The demo command sends an error and a performance trace so you can confirm the connection works:appsignal install commands run this for you at the end, so you may already have seen it. Node.js has no such command, so run the demo yourself. Run it again at any time, or start your application and make a few requests instead.
Step 5: Deploy
Commit the changes and deploy your application. Once the deployed application handles traffic, its errors, traces, and host metrics appear on AppSignal.com. For the full reference on your language, read its installation and configuration pages:- Ruby installation and Ruby configuration
- Elixir installation and Elixir configuration
- Python installation and Python configuration
- PHP installation and PHP configuration
- Node.js installation and Node.js configuration
Installing other languages
These languages don’t use the installer flow above. Follow their own installation instructions instead:- Front-end JavaScript installation instructions: configured with a front-end Push API key, with the application name and environment set in the wizard.
- Go installation instructions: wire up the OpenTelemetry SDK in your application code.
- Java installation instructions: run your application with the OpenTelemetry Java agent.
- OpenTelemetry installation instructions: for any other language that exports OpenTelemetry data.