Creating a Log Source
✨ You do not need to create a log source when sending logs directly from an
AppSignal integration. A log source will be automatically created for you.
Follow the instructions for logging from AppSignal
integrations.
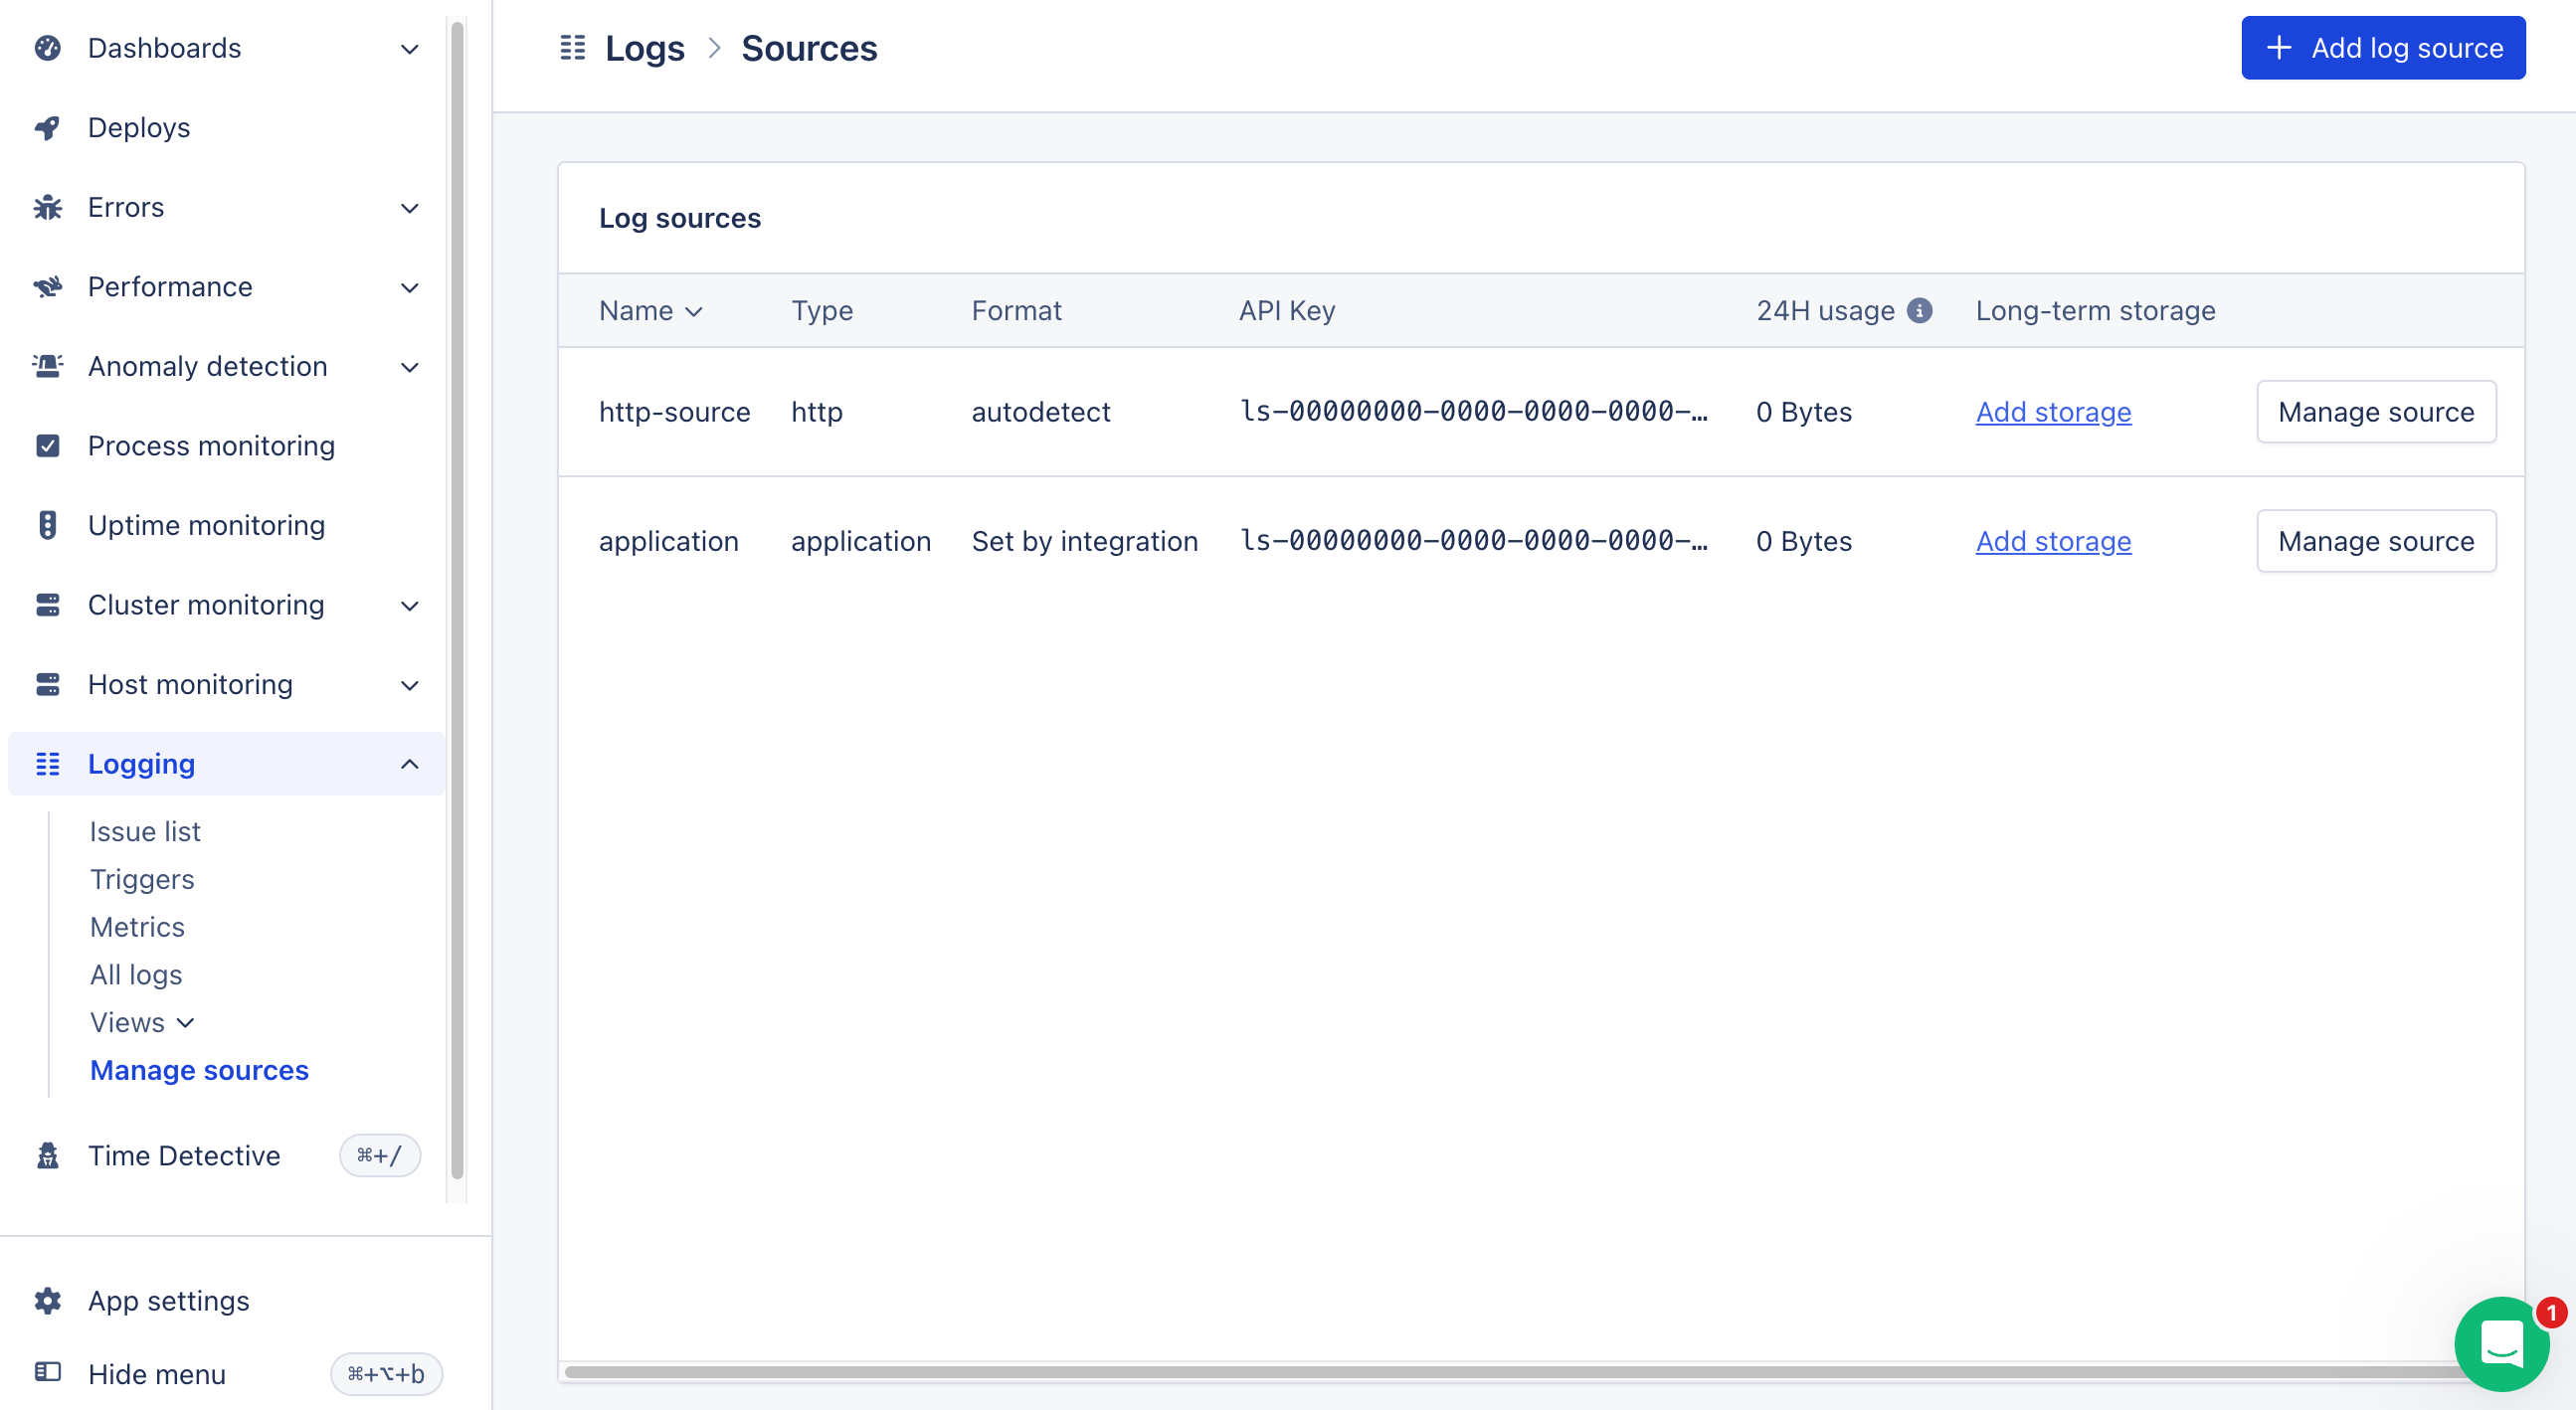
Add log source button in the top right of the page.
A pop-up will appear, prompting you to name your source. It’s important to give your source a descriptive name like Redis or MongoDB so that you can successfully query these logs in the future.
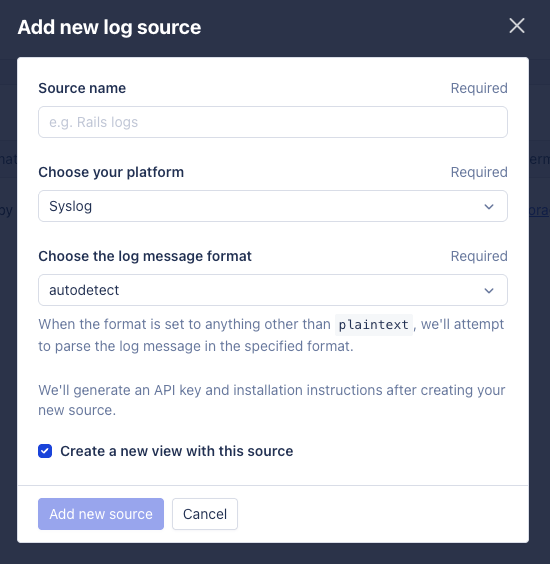
Choose Your Platform
We support sending logs to AppSignal from various sources and platforms and are hard at work to add support for more. You can find out more about the platforms supported in this documentation’s Platform Configuration section. If your platform is not listed, you can send logs to one of our endpoints directly.Choose The Message Format
Some sources are based on a third-party integration, where you can’t control the format of the log line. In this case, you can choose the format of the log line that AppSignal will attempt to parse themessage from.
This allows you to add structure to your log lines, without controlling the surrounding log line format. For example, if you use the Netlify integration, which takes care of sending log lines to AppSignal in their own format, allowing us to extract the correct time and hostname, you can choose the json log format to add additional attributes to a log line.
When we support parsing the log message, we support these formats:
Read more about how to format your messages in the Formatting Documentation.
Create Source
Once you’ve chosen the name and format of your new source is created, it will be listed in the Log Sources table on the Logs page, alongside a generated API key.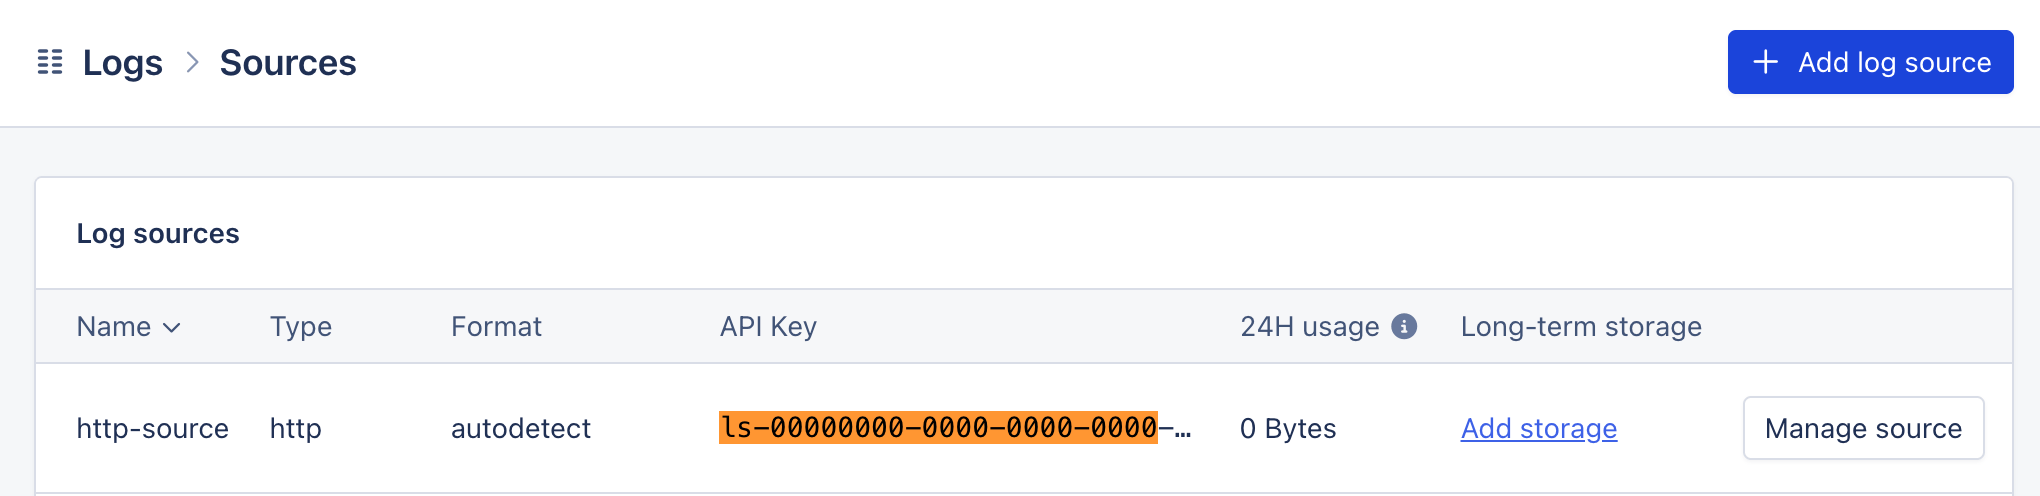
Platform Configuration
Once you’ve created a new source, you’ll need to configure your application to send logs to AppSignal. This should be via the same platform you defined when creating your log source.Supported Logging Platforms
- AWS CloudWatch logs through Amazon Data Firehose
- Clever Cloud
- Gigalixir Log Drain
- Heroku
- Netlify
- Render
- Scalingo
- Vector
- Vercel
Supported Logging Endpoints
Completing Setup
As AppSignal only stores logs that are sent to it from your application, you
will only be able to see logs created after you’ve completed your
configuration.
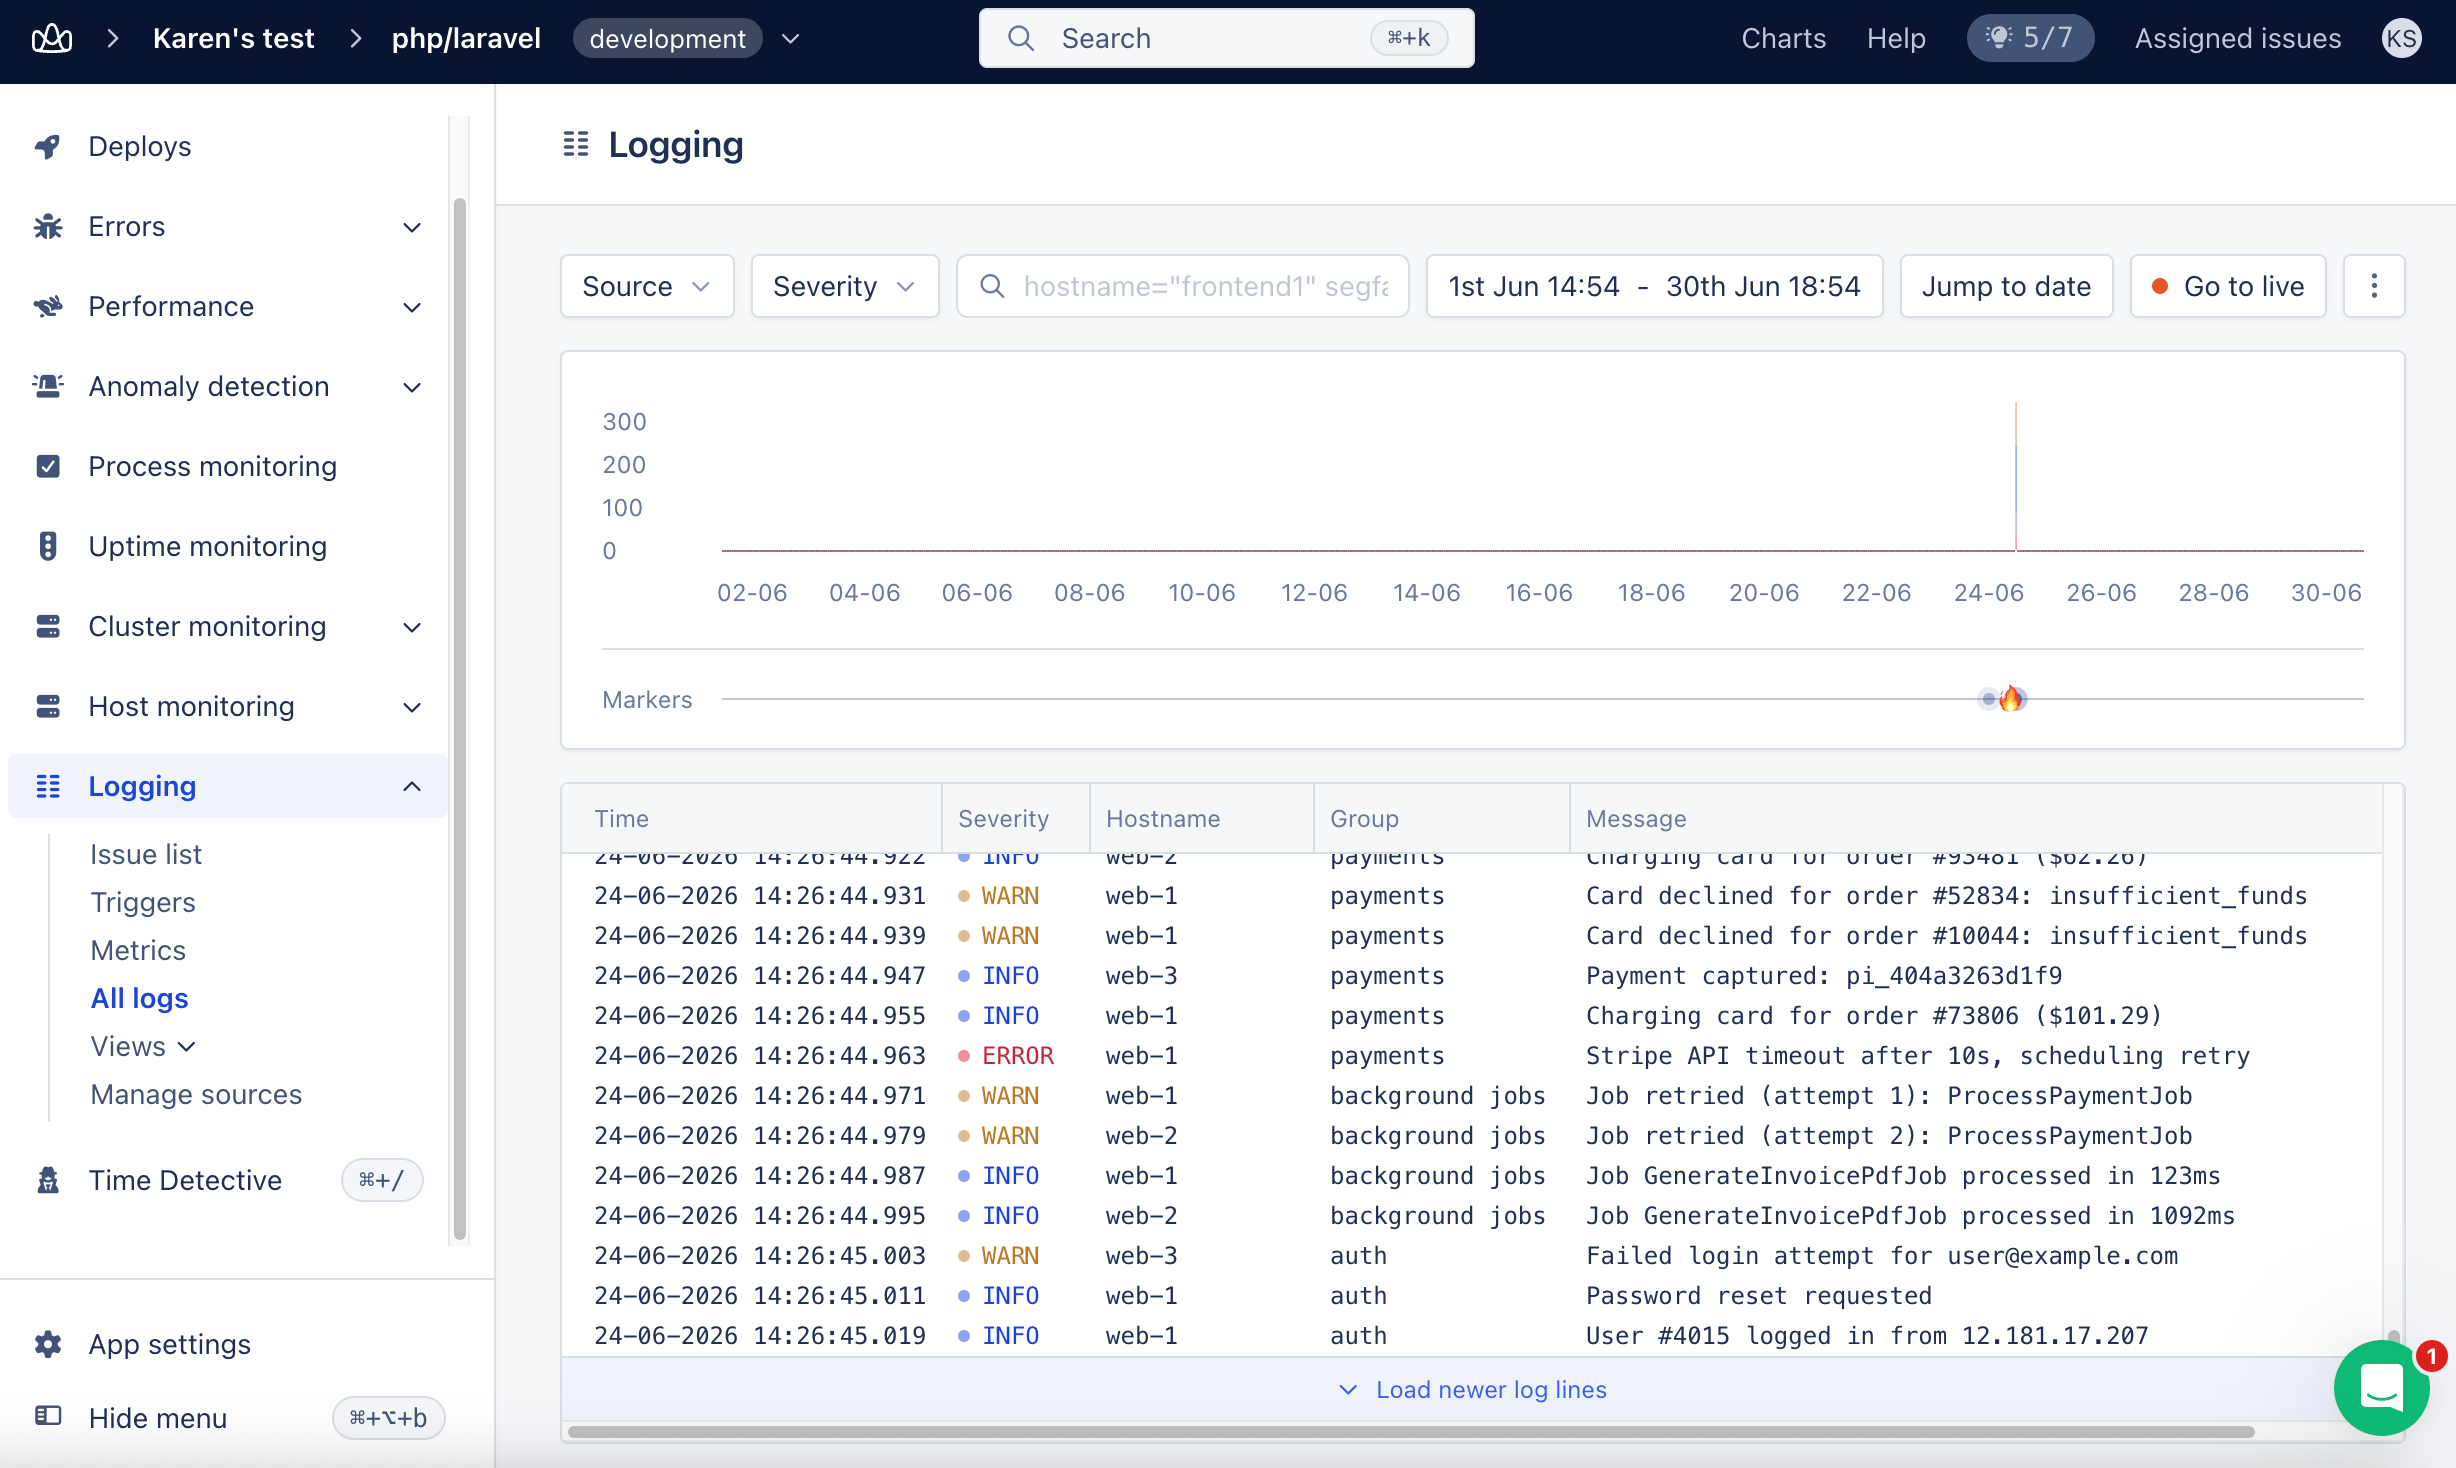
All logs page in the AppSignal application. There’s more information on how to manage, view, and query your logs in this guide’s next step.