Custom instrumentation for Node.js
Including custom instrumentation in your application can be useful for identifying the specific lines of code causing performance problems. AppSignal provides helpers, which let you display relevant data about the state of your application alongside performance metrics to assist you in identifying the root causes of any performance problems your application may be experiencing.
Setup
To use AppSignal's helper functions in your instrumentation, you must first import opentelemetry and define a tracer object. Depending on your instrumentation, you may also need to create additional spans.
Our Example Use Cases demonstrate how you can use tracers, spans, and helpers to create your custom instrumentation.
Import OpenTelemetry and Define Tracer
The AppSignal integration for Node.js uses OpenTelemetry tracer objects. These tracers contain various functions for creating custom instrumentations.
The Tracer exposes functions for creating and creating new spans. This documentation will outline how you can use tracers and spans to implement your custom integration.
You must first import the trace object from @opentelemetry/api before working with tracers and spans. By invoking the getTracer function on the trace object a new tracer object can be created. You must give your tracer object a name in this function, as seen in the example below, where the getTracer function is used to define a tracer with the name "my interesting app".
import { trace } from "@opentelemetry/api";

const tracer = trace.getTracer("my-interesting-app");
Spans
A span is the name of the object that we use to capture data about the performance of your application, any errors and any surrounding context. A span forms part of a broader trace, a hierarchical representation of the flow of data through your application. Spans keep track of the start and end time of an event, along with other information, such as the name or other data related to it.
You can read more about spans in the OpenTelemetry Tracing Documentation.
Creating an Active Span
New spans can be invoked via the trace object. Code instrumented inside an Express of Koa handler will already be inside a span. You can create new spans by invoking thestartActiveSpan() function on the tracer object. Newly created spans will be the child of the span they were created in, if one exists. You can use child spans to measure the performance of tasks executed from within a parent span.
You should give your span a name that makes its purpose clear. Execute all of the tasks you wish to monitor within the startActiveSpan() function, like in the below example.
tracer.startActiveSpan("printing coffee beans", async (span) => {
  const coffeeBeans = await fetchAllCoffeeBeans();
  console.log(coffeeBeans);

  span.end();
});
After the task is complete, you must close the span: span.end()
Example Use Cases
When implementing custom instrumentation, you may be curious to understand the behavior of particular functions, for example, how long it takes for them to execute.
Using Helpers
In the below example, we are curious about the performance of our "order-coffee" GET endpoint for different roasts of coffee. To investigate this, we use the setAttribute function to create a tag called flavor, the value we retrieve from request parameters.
Note: Because this is inside an Express request handler, a root span has already been created.
app.get('/order-coffee', (req, res) => {
    const roast = req.params.roast
    setTag("roast", roast)

    const coffeeBeans = pickCoffeeBeans(roast)
    prepareCoffeeBag(coffeeBeans)
  })
}
To get deeper insights into how our code is performing, we can use child spans to inspect functions called within our Express handler.
The code below creates a child span of the "picking coffee beans" span defined in the pickCoffeeBeans function.
Once the attribute has been assigned and all functions executed, we .end() the span to ensure AppSignal receives the start and finish time and attributes we've assigned:
function pickCoffeeBeans(roast) {
  tracer.startActiveSpan("picking coffee beans", async (span) => {
    const roastBrands = {
      light: "Caffinated Cloud",
      medium: "Feeling The Buzz",
      dark: "The Jitters",
    };

    const roastBrand = roastBrands[roast];

    setTag("brand", roastBrand);
    await retrieveDrinkTypes(roastBrand);
    span.end();
  });
}
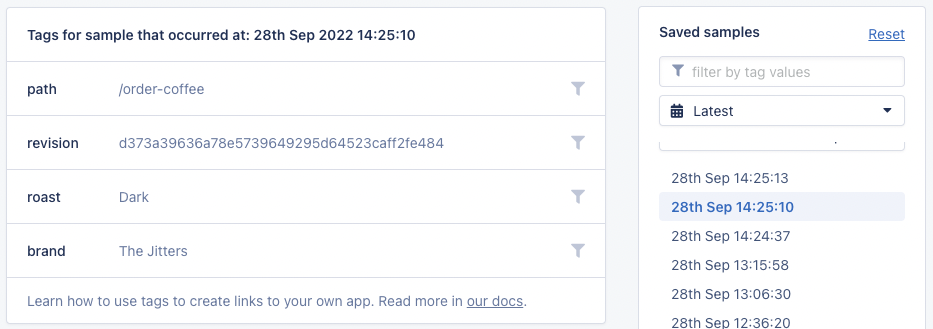
In AppSignal, we can see performance data for this function. We can use the roast and batch tags to filter the data and gain greater insights into what parameters potentially influence how our application's code behaves.

Active Spans
While tags are helpful to analyse performance differences on the same function, it does not give us insight into the performance of any functions called from within our function.
To give us greater insights into what's happening inside of the pickCoffeeBeans(), we create a new activeSpan and name it "picking coffee beans". All logic we wish to track is executed from within an async function.
We await the promise returned by retrieveDrinkTypes(), so that we can track it's performance as a child span of the "picking coffee beans" span we created in pickCoffeeBeans().
function pickCoffeeBeans(roast) {
  tracer.startActiveSpan("picking coffee beans", async (span) => {
    const roastBrands = {
      light: "Caffinated Cloud",
      medium: "Feeling The Buzz",
      dark: "The Jitters",
    };

    const roastBrand = roastBrands[roast];
    await retrieveDrinkTypes(roastBrand);
    span.end();
  });
}

function retrieveDrinkTypes(roastBrand) {
  return new Promise((resolve) => {
    const span = tracer.startActiveSpan("Fetching coffee types");

    const brandDrinks = {
      "Caffinated Cloud": ["americano", "capuccino"],
      "Feeling The Buzz": ["capuccino", "latte"],
      "The Jitters": ["espresso"],
    };

    const drinkTypes = brandDrinks[roastBrand];

    // we want to give our Barista's some time prepare the machine
    setTimeout(() => {
      resolve(drinkTypes);
      span.end();
    }, 60000);
  });
}
With this instrumentation, AppSignal will provide insights into the performance of the pickCoffeeBeans(), which will include the performance data of the retrieveDrinkTypes() function, providing greater insight into what factors are impacting the overall performance of a function.
Helpers
To use helper functions, you must first import them from @appsignal/nodejs. In the example below the namespace the code is being executed in is being reported to AppSignal. All available helper functions are outlined in the below documentation.
import { setNamespace } from "@appsignal/nodejs";

setNamespace("web");
All available helper functions for custom instrumentation attributes are outlined in the list below.
Helper Functions
- Namespace
- Tag
- Request Parameters
- Set Session Data
- Request Headers
- Root Name
- Custom Data
- Child Span Helpers:
Namespace
Sets the string value of the root span namespace.
import { setNamespace } from "@appsignal/nodejs";
setNamespace("app");
Tag
Sets a tag, for example from a request parameter, which can be used as a filter from within the AppSignal application. In the below example we create a tag called color with the value blue. You can configure tags with names relevant to the context of your application.
import { setTag } from "@appsignal/nodejs";
setTag("color", "blue");
Request Parameters
An object that is serializable to JSON. Incoming request parameters request body and query parameters.
import { setParams } from "@appsignal/nodejs";

const exampleParams = { action: "delete" };
setParams(exampleParams);
Set Session Data
An object that is serializable to JSON.
import { setSessionData } from "@appsignal/nodejs";

const exampleSessionData = { locale: "en-GB" };
setSessionData(exampleSessionData);
Request Headers
A string containing the header value.
import { setHeader } from "@appsignal/nodejs";
setHeader("Content-type", "application/json");
Root Name
Allows you to set the name of the trace. Samples are grouped into actions by their trace name.
import { setRootName } from "@appsignal/nodejs";

// somewhere in your code where there's an active span...
setRootName("The action name");
Example Use Case
Your application has an endpoint called GET /coffee.
app.get("/coffee", (req, res) => {
  // ...
});
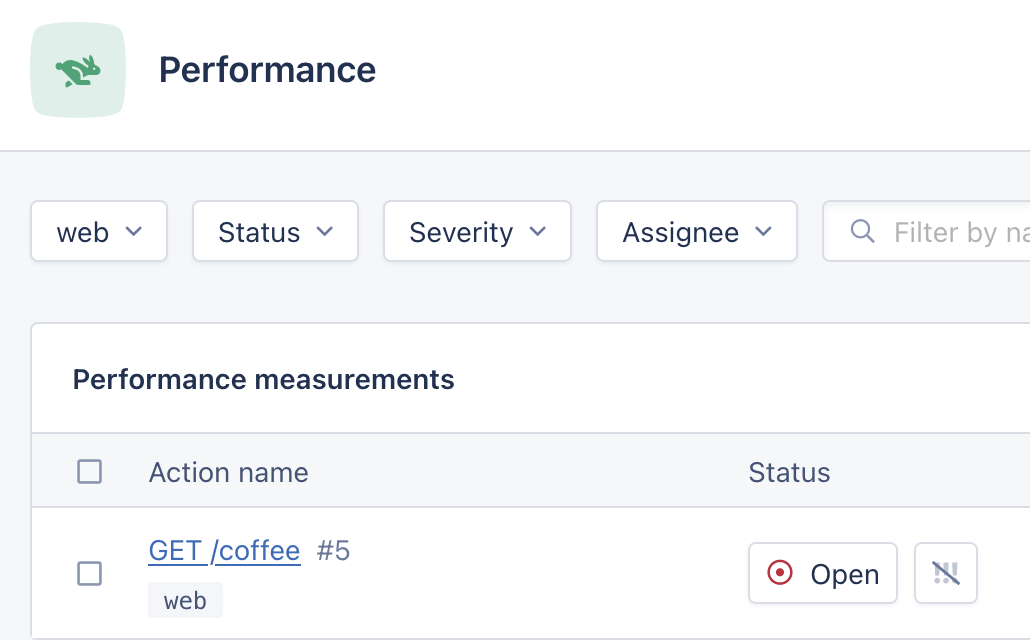
All requests to this endpoint will generate samples called GET /coffee, but your endpoint handles multiple actions: coffee?action=buy, and coffee?action=sell.

While they all use the GET /coffee endpoint, they are conceptually very different and so it would make sense for them to be grouped separately in AppSignal rather than in the same GET /coffee sample. To do this, you can use the setRootName() helper:
import { setRootName } from "@appsignal/nodejs";

app.get("/coffee", (req, res) => {
  if (req.query.action === "buy") {
    setRootName("Buy coffee");
    // ... buy coffee
  } else if (req.query.action === "sell") {
    setRootName("Sell coffee");
    // ... sell coffee
  }
});
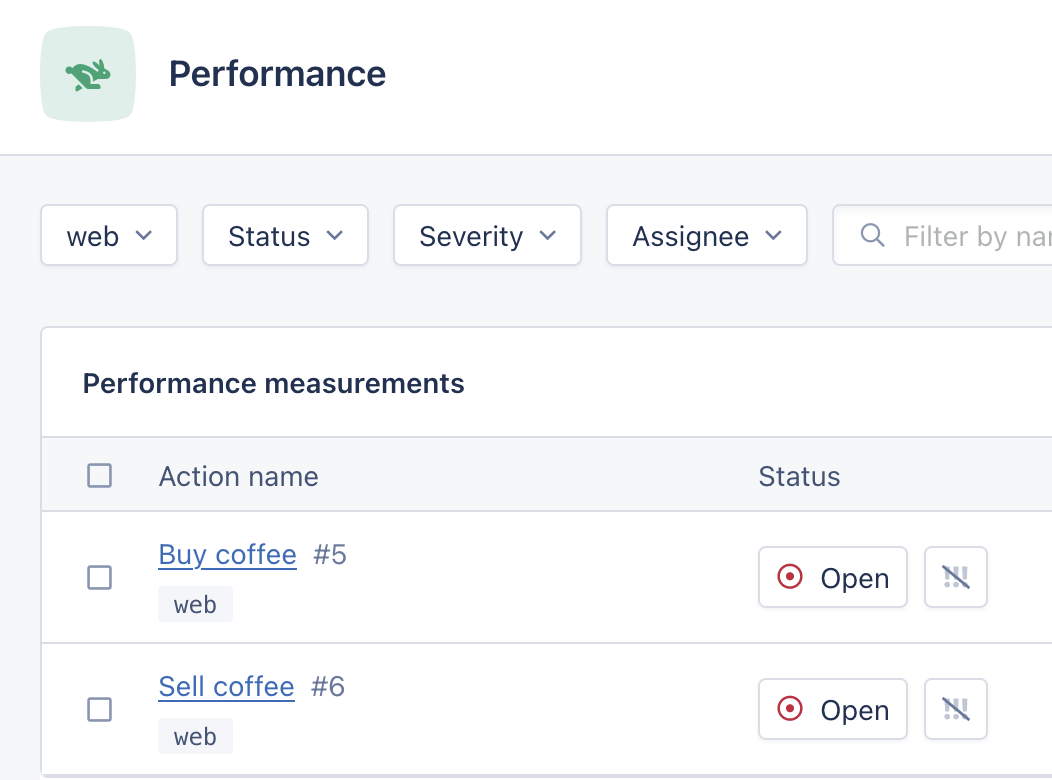
Using setRootName will change the name of the root span, grouping the samples for the requests coffee?action=buy and coffee?action=sell into separate actions:

Custom Data
An object that is serializable to JSON.
import { setCustomData } from "@appsignal/nodejs";

const exampleCustomData = { stroopwaffle: "true", coffee: "false" };
setCustomData(exampleCustomData);
Child Span Helpers
The following helpers only apply to child spans. To create a child span, you must create a new Active Span.
New spans are automatically children of their parent span.
Category
A string containing the child span category. The name should use . to express the category's hierarchical inheritance. For example: cafe.coffee.cupsize
import { setCategory } from "@appsignal/nodejs";
setCategory("category.name");
Name
A string containing the child span event timeline title.
import { setName } from "@appsignal/nodejs";
setName("Users query");
Body
The span's body can include additional information about the event, like the HTTP request, the connected host, etc. Be sure to sanitize the information before adding it to the span so no Personal Identifiable Information is sent to AppSignal. This information will be visible for the span when hovering over the event timeline.
To store SQL queries in the span's body, please use the setSqlBody helper instead.
import { setBody } from "@appsignal/nodejs";
setBody("Span body");
SQL body
Set a SQL query as the body of the span as it appears in the performance event timeline in the incident sample detail view. This is similar to the setBody helper, but is specialized for SQL queries. Any SQL query set as the body with this attribute will be sanitized to avoid sending PII (Personal Identifiable Information) data to our servers.
See the setBody helper for more details on how the body attribute works.
When both the setBody and setSqlBody helpers are called on the same span, the setSqlBody helper's value is leading and the setBody helper's value will be ignored.
import { setSqlBody } from "@appsignal/nodejs";
setSqlBody("SELECT * FROM users");